Wednesday, November 20, 2013

Blueberry Oat-Bran Muffins

Total Time: 40 minutes    Bake time:  22-28 minutes   Preheat Oven to:  350 F


12 disposable muffin cups (or cooking spray)
1 cup non-dairy milk
1 Tbsp apple cider vinegar
1 cup oat bran
1 1/8 cup whole wheat pastry flour
1/2 cup granulated sugar
1 1/2 tsp baking powder
1/2 tsp baking soda
1/4 canola oil
1/4 cup unsweetened applesauce
1 Tbsp molasses*
2 Tbsp maple syrup**
1 tsp pure vanilla extract
1 cup blueberries (fresh or frozen)


-Prepare a 12-cup muffin pan either with cooking spray or by lining it with disposable muffin cups.
-In a small bowl, combine the milk and apple cider vinegar and set aside to let curdle.
-In a medium bowl, mix the oat bran, flour, sugar, baking powder, baking soda and salt.
-Add oil, applesauce, molasses, maple and vanilla to the WET ingredients.
-Make a well in the dry ingredients and pour in the wet ingredients.  Mix together so that the dry ingredients are moistened.  Do not over-stir because this will make for tough, chewy muffins.
-Fold in the blueberries.
-Spoon the batter into the prepared muffin tins so that they're almost full. Make sure all of the cups have even batter.  If you have extra cups, put a small amount of water in them so that the empty metal cups won't become a hotspot for heat that would have otherwise gone towards baking your muffins.
-Bake in the oven for 22-28 minutes.  With frozen berries, I baked mine for 26 minutes.  Four minutes before I took them out, though, I switched them to the top rack of my oven to give them crusty tops.
-Let the muffins cool in their tray for ten minutes before attempting to remove them.


 *Tips and Tricks*
*I used black strap molasses because I love the strong flavour but if you're not a fan, you can use light molasses or stuff labeled for baking.
**Instead of using maple syrup which is quite price, you can use maple syrup extract which is essentially more concentrated than regular syrup.  In this case you can use about one tablespoon of the extract rather than two of the real stuff with the same flavour benefits.


Tuesday, November 19, 2013

Apple Sauce

Absolutely Worth It!
You may think that making apple sauce at home isn't much better than buying some at the store.  "It tastes the same" you might say.  "It's too much work"  is another common excuse.  However, once you've gone through the simple process of making your own apple sauce, you'll never even consider picking some up at the supermarket.  Apple sauce made from home is so much more fresh-tasting, succulent and rewarding than in any other form.

All you need is at least 30-50 fresh, sweet apples.

-First, make sure you have a strainer.  This is what will actually mush up your apples and separate the good stuff from the pulp.  I use the Victorio VKP250 which can be found on Amazon (I'll post a web link at the bottom).  Any strainer specified for apple sauces or jams will work, though.


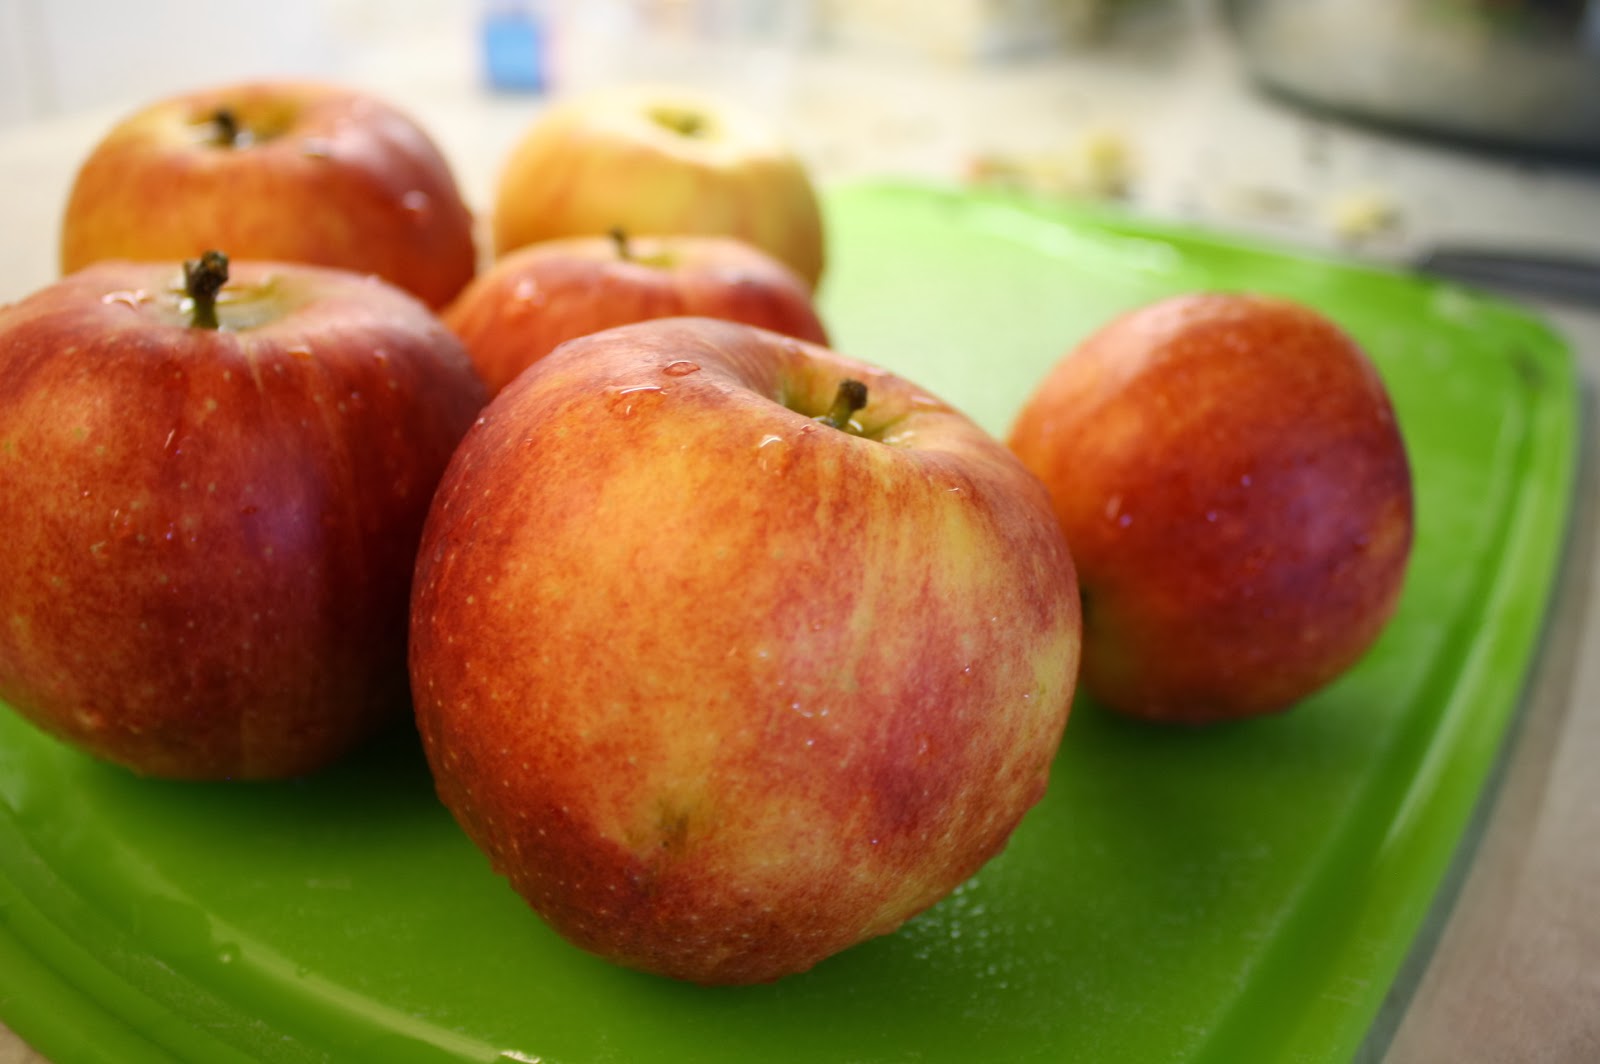
-Wash your apples.
-Slice them in into quarter, discarding the stem.  Skin and seeds should be left on.
-Put the chopped apples into a large pot with water.  Set onto a boil for about 10-20 minutes (depends on how much water you put in and how many apples you have).  They are done when they become quite mushy.
-While the apples are boiling, set up your strainer.  Make sure you have a large bowl for the side where the sauce shoots down and a bowl or compost bin on the end where the pulp will come from.
-If you have a lot of water still in the pot, use a ladle to scoop some of it out.  If  there is too much excess water with the apples, the sauce may be too runny.  However, leaving a little water with them won't hurt.
-Dump apples into the funnel of your strainer until it is about 3/4 to 4/5 of the way full.  
-(If you're using the VKP250) use the pusher to help force the apples down the tube as you crank the handle.  Turn it quite quickly because this is what rotates the grate itself.
-Clear the pulp bowl as needed.  You may want to run some of the pulp through again if the sauce is coming out too runny.  In some cases, I've put the pulp through two or three times.  
-Scoop the fresh apple sauce into jars for canning or into old milk cartons for freezing.  Freezing the sauce keeps it tasting fresher.  However, canning is a great way to make the sauce last for years.  I'll post directions on the canning process soon.
She's a happy canner.


Link to purchase the VPK250 strainer:

Monday, November 18, 2013

World's Best Pancakes

Total Time:  30 minutes       On Your Feet: 20 minutes      Yields: 8-12 pancakes

Why World's Best?
If you're like me, you want something light, fluffy and nutritious in the morning.  You don't want anything that takes longer than twenty minutes on your feet to make.  You want to be able to make something more than just a bowl of cereal for your family.  This vegan pancake fulfilled all of those things for me.  With less than 120 calories per flapjack, they also include 8% of your daily amount of iron, 3 grams of protein and have minute amounts of sodium and fat.  I've tried recipes for vegan pancakes from nearly every available source.  Yet even my mum's renowned recipe could not compare to this fluffy delight.

1 1/2 cups all-purpose flour
3 1/2 tsp    baking powder
1 tsp          salt
2 Tbsp       granulated sugar
1 cup         coconut milk (or other non-dairy)
2 tsp          apple cider vinegar*
1/2 cup      water
3 Tbsp       canola oil
1/2 tsp       pure vanilla extract

-Sift the flour, baking powder, salt and sugar together into a medium mixing bowl.  Make a well in the centre.**
-Measure milk, vinegar and water into a small bowl or cup.  Stir vigorously until the mixture is foamy.  Add to dry ingredients.
-Add the oil and vanilla and use a fork to mix the batter until it comes to the desired consistency.
-Preheat a frying pan to ensure an even  griddle temperature.
-Let the batter rest for ten minutes.  To get the "egg effect" we rely on the vinegar reacting with the baking powder.  This rest time will ensure a proper reaction.
-After the break, lightly coat the griddle with oil.  You don't need much, especially if you use a non-stick pan.
-Scoop about 1/3 cup of batter at a time onto the pan. Cook for approximately 3 minutes on low heat.***  To be sure when to flip, watch for little bubbles forming on the batter side of the pancake.  This is an indicator that the underside is becoming crisp and the middle is being cooked.
-Let cool for about 3 minutes.

*Tips and Tricks*
*If you're unfamiliar with apple cider vinegar, I recommend you get some.  I use Bragg's Aminos brand.  This type of vinegar is a lot healthier than regular vinegar and adds its own twist.  Don't worry if it smells rancid, that's how it's supposed to smell.
**Making a well simply means to dig out the dry ingredients from the centre of the bowl so that there is a little empty "pool" with flour walls.  By pouring the wet ingredients in the well, you create a specific consistency in the mixture.
***On my stove there are ten heat settings and the sweet-spot for these pancakes is between 3 and 4.  It just takes some little adjustments to find your stove's sweet-spot.


Sunday, November 17, 2013

Chocolate Chip Cookie Delight (Vegan!)

Preparation Time:  15 minutes   Bake Time: 10-12 Minutes   Preheat Oven to:  350 F    
Yields: 12 Large Cookies

Cookie Outrage
I have dug through endless amounts of cook books and searched for hours on-line for a good, vegan cookie.  I've eased the cookie cravings with carob clusters, lumpy banana-nut cookies and peanut butter cookies as well but nothing could fill the empty space of a good chocolate chip cookie.  Going vegan meant there was no easy way out when it comes to baking in a world dominated by eggs and milk.  I've baked many a cookie that turned out flat and tough and almost gave up the search until, at last, I found it.  In the phenomenal recipe book "Isa Does It"  I found the recipe for rosemary-chocolate chip cookies.  I was inspired by the simplicity of the recipe; there was no "vegan butter" or vegan egg formulated in a laboratory.  Everything was right there, in my pantry.  After a little modification I've now discovered the ultimate cookie recipe.  Here goes.

1/2 cup   coconut oil
1/3 cup   light brown sugar
1/4 cup   granulated sugar
1/4 cup   pure coconut milk (or almond, or rice, etc.)
2 tsp       pure vanilla extract
1 cup      all purpose flour*
1/3 cup   whole wheat flour*
1/2 tsp    salt
1/2 tsp    baking soda
1/2 cup   Chocolate Chips**

-Preheat oven and grease baking pan(s).***
-In a large mixing bowl, soften the coconut oil with a electric mixer.****
-Add both sugars and beat for about one minute.
-Add milk and beat again (30 seconds).  
-Mix in vanilla.
-Add about half of the flour (and you can still use the electric mixer at this point) as well as the salt and baking soda.  Mix very well!
-With a large fork, stir in the remaining flour and chocolate chips until you have a cookie dough consistency.
-Scoop the dough onto your pan.  Try to make each cookie an equal size for even baking.  
-Bake for ten to twelve minute and until the bottoms are golden brown.  To test their readiness, touch them lightly on the top.  If the cave in, the inside is not yet baked.
-Let cool for three minutes and then transfer to a fancy plate and enjoy.

Tips and Tricks
*I used a bit of whole wheat flour because I found the batter before that to be  WAY to sweet.  I liked the more biscuity flavour that this flour produced.  However, if you're serving a picky eater or if you really do have a sweet tooth, treat yourself to all 1 1/3 cup of all purpose flour.
**Being a vegan, I wouldn't accept any old chocolate chip.  I used Enjoy Life chocolate chunks which consist of cocoa powder, cocoa mass and brown sugar.  The best way to go, however, is always carob because of the higher nutrition content.
***To grease my pan I just took a little chunk of coconut oil and rubbed it on the pan.  The warmth of my hand melted it.
****Winter is the best time to use coconut oil in your cooking.  During the summer with higher house temperatures, the coconut oil becomes liquid in your jar.  For this recipe we want a soft, creamy coconut oil so if you do have runny coconut oil, you can first chill it in your refrigerator for just a few minutes.  

Don't worry.... that milk in the glass is coconut milk.  I'm not cheating.


Monday, April 29, 2013

Quick Biscuits

Preparation Time:  30 minutes         Preheat Oven: 425 F          Yields: 12-16 biscuits
Surprising!
When I gave up milk and eggs, I thought I was saying goodbye to my good ol' soup and tea biscuits.  So, it served me quite a surprise to find this total vegetarian recipe that actually turned out... biscuity.  I hope you enjoy the familiar taste with a twist as much as I do.


2 cups of mixed whole wheat and all-purpose flour
3 tsp. baking powder
1/4 tsp. sea salt
1-2 Tbs. honey
1/4 cup of oil
3/4 cup of soy, rice or nut milk

-In a bowl, stir flour, baking powder and salt together.
-In another bowl, mix/blend oil, milk and honey.
-Make a well in the centre of the flour mixture, adding liquid all at once.
-Use a fork to stir the mixture.  It should form a loose ball and be moist.
-Turn onto a lightly floured surface
-Gently knead with 3-5 strokes.
-Press or roll the dough to be 5/8" thick.

-Cut the dough into biscuit shapes using a biscuit cutter or the rim of a glass.
-Place 1/2" apart on a non-stick cookie sheet.
-Bake for 15 minutes or until golden.
-Enjoy with soup, tea or fresh strawberries.


Lemon Pie

Preparation Time: 30 minutes       Bake time: 40-45 minutes      Preheat Oven to: 425 F        Makes: 1 Pie in an 8 or 9" pan

Crust
1 cups of whole wheat flour
1 cups of all-purpose flour
1/2 cup of water or cold soy or nut milk
1/3 cup of oil
3/4 tsp. sea salt

-In a mixing bowl, sift flour and salt.
-Pour the oil and milk into a measuring cup and add to the flour, stirring lightly.
-Form into a ball.
-Roll the crust out on a floured surface into a large circle.
-Fit to pan, pressing it firmly down.  Squish the edges with the fore-fingers and thumb.
-Bake for 40-45 minutes until it becomes golden brown.  The filling is not to be baked in the oven, only the pie shell.


Filling
1/2 cup of warm water
7 Tbs. of corn starch
2/3 cup of cashews, rinsed
2/3 cup of light honey, to taste
1/3 cup of coconut, fine, opt.
1/4 tsp. of sea salt
2-3 Tbs. finely grated lemon zest
3 cups of mixed water/ pineapple juice or pineapple coconut juice
5-6 Tbsp. fresh lemon juice


-In a saucepan, stir 1 Tbs. of the corn starch into warm water.  Heat and boil for 1 minute to dissolve.
-Pour into blender; add cashews, coconut, honey, salt and lemon zest with 2 cups of the water or juice, adding gradually while blending smooth.*
-Return mixture to saucepan, heat on low; stir to avoid sticking
-Blend remaining 1 cup of liquid with the last 6 Tbs. of corn starch then add it to the hot mixture.
-Stir constantly until the mixture comes to a boil and thickens.
-Stir in lemon juice
-Pour into the the prepared (pre-baked) pie crust.
-Chill until firm.
-Garnish with thin slices of fresh lemon, grated coconut or sou whip cream.


Tips and Tricks
*When blending, add the cashews and liquid first until it is smooth.  At this point, you can add the other ingredients.  This technique is used to create a proper consistency. 

Wednesday, April 10, 2013

Sweet Popcorn Squares or Balls

Preparation Time:  30-45 minutes      Serves: 36

1 cup of honey
1/2 cup of raw sugar*
1/4 cup of light molasses (or 1/8 cup of black strap)**
1/4 cup of water
2-3 tsp. of vanilla
1 tsp. of orange zest***
1 cup of popcorn kernels 
1 tsp of salt
1 cup of choice nuts (opt.)

-Add first four ingredients to a pot on medium heat (7/10) stirring constantly until mixture boils.  It will be frothy.  Let it boil for about 3 minutes, stirring occasionally.
-Reduce heat and simmer, stirring occasionally.  To test it's readiness, put one or two drops of the mixture into water.  If it forms a hard ball, it's done.  I would have the mixture on the stove top for around 15-20 minutes in total.
-Add vanilla and orange zest
-Pop popcorn in an air popper and add salt.  You should have about 10-12 quarts of popcorn.
-Add the nuts of your choice to the popcorn.
-Remove the mixture from heat and pour it over the popcorn, stirring gently with a long spoon.  
-Once the popcorn is coated in the mixture, quickly press it in an greased pan or form tight balls.  Do this within three minutes or the popcorn may dry together.****
-If in cake pan, you can cut it up into bars and decorate with nuts if you wish.


Tips and Tricks
*I used 3/8 cups of white sugar and 1/8 cup of brown sugar.  You can mix different kinds of sugars, if you wish.  If'it's sweet, it'll work.
**You can chose between black strap or light molasses.  I prefer light but really, it's just a personal preference thing.  Maybe try the recipe a few times to see how you like it.  But be sure that if you use black strap molasses, use less of it and the 1 cup of honey or else the mixture may be too strong.  If you use light molasses, you can use less honey.
***When you have the word "zest" in a recipe with a citrus fruit name before it, it usually means to grate a bit of the fruit rind off into the mixture.  For example, with orange zest, I took a fine cheese grater and grated some of the outside of the orange peel onto a plate then measured out my tsp.  It definitely adds a flare to the mixture.
****When packing the coated popcorn into a pan or into balls, coat your hands in margarine or oil to prevent the sweet stuff from sticking to you.  Also, if you don't get to packing it quick enough, the popcorn may dry and you won't be able to form it freely.


Enjoy!  Because we all need something sweet now and again!